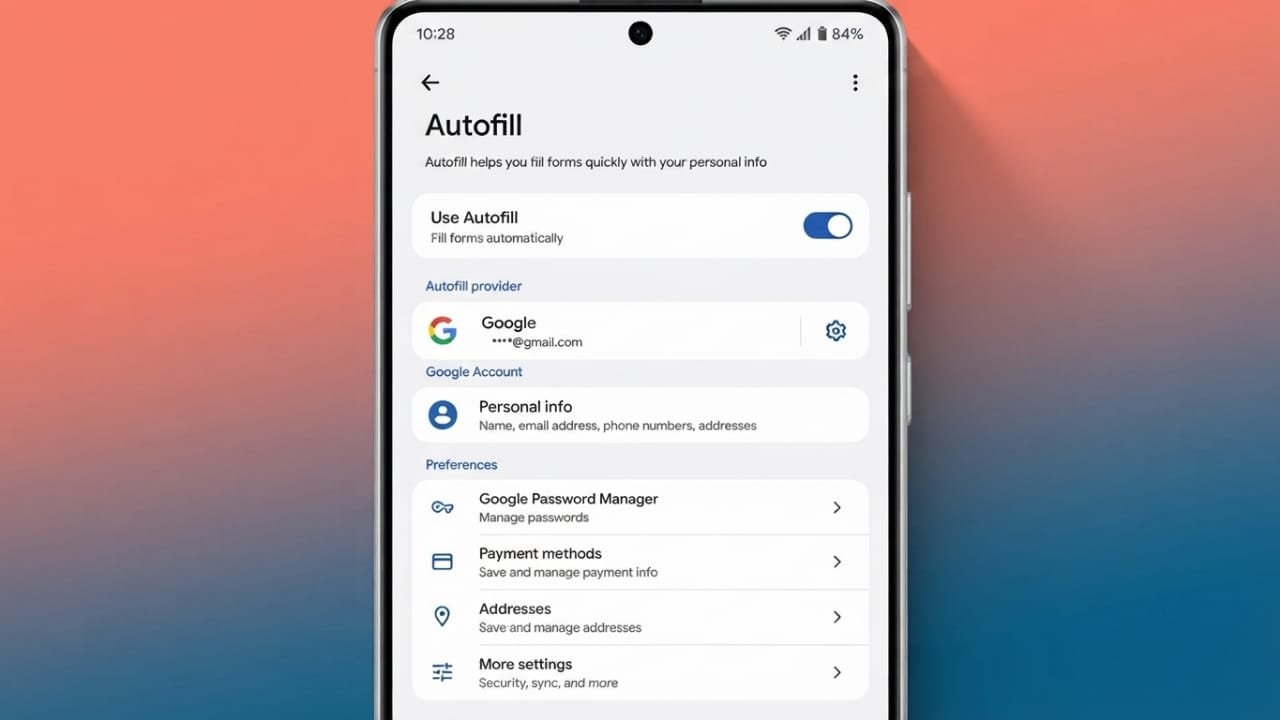
Typing the same details again and again can be frustrating, especially when filling out online forms. Android’s Autofill feature solves this problem by securely saving information like passwords, addresses, phone numbers, and payment details. When you visit a supported app or website, your saved information can be filled in automatically, making the process much faster.
You can also update, delete, or change your saved information whenever needed. Here’s a complete guide to managing Android Autofill settings.
Also read: How to Fix Notification Problems on Android
What Is Android Autofill?
Android Autofill is a built-in feature that remembers frequently used information and fills it into compatible apps and websites. Instead of entering the same details every time, Android inserts the saved information automatically.
Depending on your preference, you can use Google’s Autofill service or a trusted third-party password manager. Keep in mind that Android allows only one Autofill service to be active at a time.
Autofill can store information such as:
- Passwords
- Email addresses
- Phone numbers
- Home and work addresses
- Payment details
- Personal profile information
How to Enable Android Autofill
Setting up Autofill takes only a few minutes. The exact menu names may differ slightly depending on your Android version or device manufacturer, but the overall process remains similar.
Follow these steps:
- Open the Settings app.
- Go to System.
- Tap Language & input.
- Open Advanced settings if available.
- Select Autofill service.
- Choose your preferred Autofill provider.
- Select Google to use Google’s Autofill service.
- Choose None if you want to disable Autofill.
- If you use a password manager, tap Add service and select your preferred app.
- Confirm your choice if prompted.
- Restart your phone if your device recommends it.
Once enabled, your selected Autofill service will begin filling supported forms automatically.
Using Google Autofill
Google Autofill works across many Google services and supported apps. It helps you access saved information without entering it repeatedly.
Some services that work with Google Autofill include:
- Chrome Password Manager
- Google Pay
- Google Maps
For example, Chrome can fill saved login credentials, Google Maps can suggest saved addresses, and Google Pay can securely use stored payment methods where supported.
How to Edit Saved Autofill Information
It’s a good idea to review your saved details from time to time. Updating outdated information helps prevent errors when filling forms.
To access your saved Autofill information:
- Open Settings.
- Go to System.
- Open Language & input.
- Tap Autofill service.
- Select the settings icon next to your Google Autofill service.
If you have multiple Google accounts on your device, make sure you’re editing the correct account before making changes.
Update Personal Information
The Personal Information section stores profile details used in online forms.
You can edit information such as:
- Full name
- Email address
- Birthday
- Gender
- Education details
- Work information
- Personal website
- Social media links
Save your changes after editing to keep your information current.
Manage Saved Addresses
The Addresses section stores locations used for deliveries, navigation, and online forms.
You can update or add:
- Home address
- Work address
- Shipping address
- Other saved locations
Keeping addresses updated helps avoid delivery mistakes and improves Autofill accuracy.
Edit Payment Methods
If you use Google Pay, you can manage your saved payment methods from the Autofill settings.
Available options include:
- Add new cards
- Edit existing payment details
- Remove expired cards
- Manage payment accounts
For security reasons, Android may restrict screenshots while you’re viewing payment information.
Manage Saved Passwords
Google Password Manager securely stores website login details.
You can:
- Save new passwords
- Turn Auto Sign-in on or off
- Review saved passwords
- Add passwords manually
- Remove passwords you no longer need
Regularly reviewing saved passwords improves both organization and account security.
How to Delete Autofill Data
If your saved information is outdated or no longer needed, you can remove it easily.
Open your Autofill settings and choose the category you want to manage:
- Personal information
- Addresses
- Payment methods
- Passwords
Select the item you want to remove, choose the delete option, and confirm your action if prompted.
Deleting old information helps keep Autofill accurate and reduces unnecessary clutter.
Managing Autofill in Brave Browser
Brave includes its own Autofill settings that work independently from Android’s Autofill service. This allows you to manage browsing-related information directly inside the browser.
To access Brave Autofill settings:
- Open the Brave browser.
- Tap the menu icon.
- Open Settings.
- Scroll to the Autofill section.
From here, you can manage different types of saved information.
Payment Methods
Brave lets you save payment information for faster online checkouts.
Available options may include:
- Save payment methods
- Require device verification before filling payment details
- Save card security codes
- Add payment cards manually
Using device authentication, such as a PIN, fingerprint, or password, provides additional protection when filling payment information.
Addresses and Form Data
Brave can also remember personal information used in forms.
This includes:
- Addresses
- Email addresses
- Phone numbers
- Other contact details
You can edit existing entries, remove outdated information, or manually add new details whenever necessary.
When visiting supported websites, Brave may ask whether you’d like to save newly entered information for future use.
Tips for Keeping Autofill Secure
To get the best experience while protecting your personal information:
- Use a trusted Autofill provider.
- Update saved information regularly.
- Remove old passwords and expired payment methods.
- Enable screen lock or biometric authentication on your device.
- Download password managers only from trusted sources.
Also read: How to Use Split Screen on Android Auto with Coolwalk
Final Thoughts
Android Autofill is a simple feature that can save time while filling forms, signing in to websites, and completing online purchases. Whether you use Google’s built-in service or a trusted password manager, keeping your saved information organized and up to date improves both convenience and security.
Review your Autofill settings regularly to ensure your passwords, addresses, and payment details remain accurate. A few minutes of maintenance can make everyday browsing faster, smoother, and more secure.

Jatin Rajput (Tech Golu) — Tech blogger & YouTuber with 6+ years of experience in WhatsApp, Instagram, Facebook, and mobile guides. Founder of TechGolu.in.