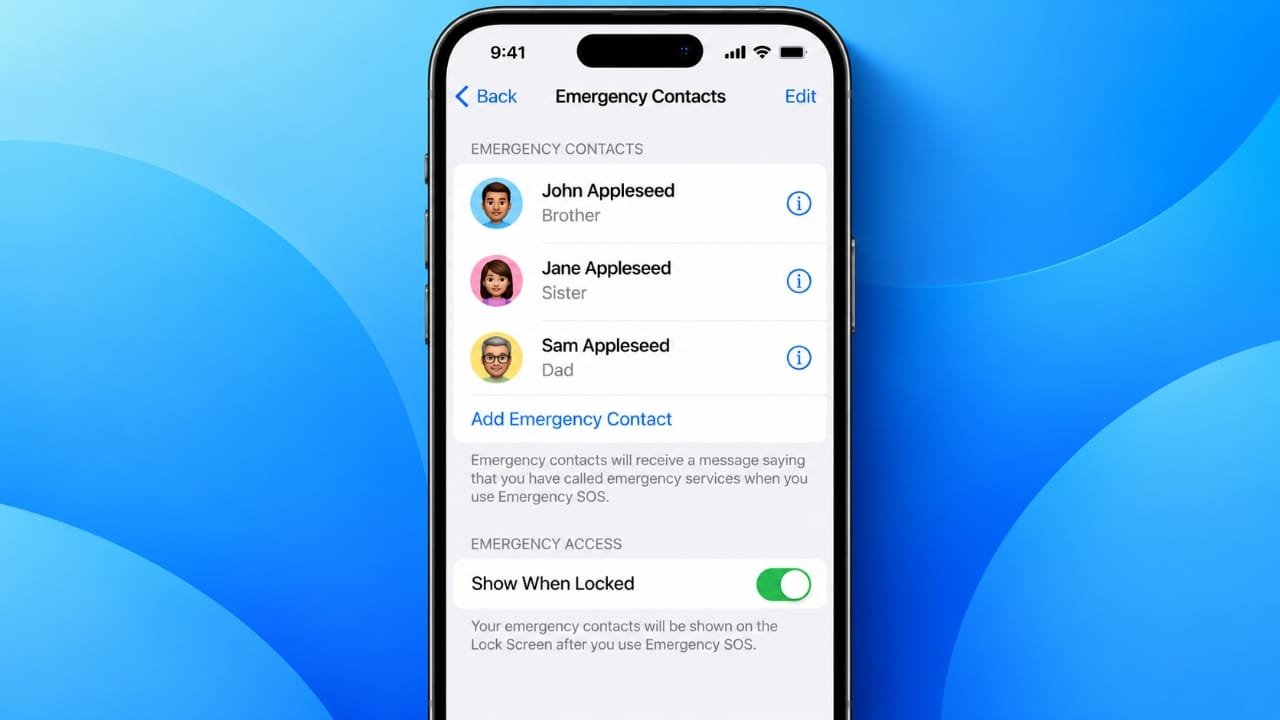
You never know when an emergency might happen. Setting up emergency contacts on your iPhone in advance can make it easier for trusted people to reach you or receive important information when you need help.
The iPhone includes several safety features, including Medical ID, Emergency SOS, emergency contacts, and location sharing. Taking a few minutes to configure them can make these tools easier to use when every second matters.
Also read: How to Turn Off Low Power Mode on iPhone, iPad, Apple Watch and Android
Set Up Emergency Contacts Using the Health App
The easiest way to manage emergency contacts is through Apple’s Health app. Along with health and fitness information, the app includes your Medical ID.
Medical ID can contain information that may be useful during an emergency, such as important medical details and the people you want to contact.
Depending on your settings and situation, Medical ID information can also be made available from the Lock Screen without requiring your iPhone passcode.
How to Add an Emergency Contact
Follow these steps:
- Open the Health app on your iPhone.
- Tap your profile picture.
- Select Medical ID.
- Tap Edit if your Medical ID has not been completed.
- Look for the Emergency Contacts section.
- Tap Add Emergency Contact.
- Choose a person from your Contacts.
- Select their relationship to you.
- Add additional contacts if required.
- Tap Done to save your changes.
You can add more than one person if necessary. Consider choosing people who know you well and are likely to respond when contacted.
A family member, partner, close friend, or another trusted person may be suitable depending on your circumstances.
Add an Emergency Contact From the Phone App
You can also add an emergency contact while viewing a person in the Phone app.
Open Phone and go to Contacts or Recents. Select the person you want to add. If you’re using the Recents list, tap the information button next to their name.
Look for the option to add the person to your emergency contacts. If multiple phone numbers are available, choose the number you want to use.
Your iPhone may then open the Medical ID settings in the Health app. Check the information and tap Done when you’re finished.
How to Remove an Emergency Contact
Your emergency contacts may change over time. Someone might get a new phone number, or you may simply want to choose a different person.
To remove a contact:
- Open Health.
- Tap your profile picture.
- Select Medical ID.
- Tap Edit.
- Scroll to Emergency Contacts.
- Tap the remove option next to the contact.
- Confirm the deletion.
- Tap Done.
It’s a good idea to review this list occasionally and make sure the information is still correct.
Let Important Contacts Reach You During Do Not Disturb
iPhone also has a feature called Emergency Bypass. It can allow calls or alerts from selected contacts to make a sound even when certain notification restrictions are active.
To check this setting:
- Open Contacts or the Phone app.
- Select the person you want to prioritize.
- Tap Edit.
- Select Ringtone.
- Look for Emergency Bypass.
- Turn it on if you want calls from that person to bypass certain silent or notification settings.
- Tap Done.
Use this setting only for people whose calls you genuinely want to receive during important situations.
Understand Emergency SOS on iPhone
Emergency SOS is designed to help you contact emergency services quickly. Depending on your iPhone model, region, and settings, you can start an emergency call using the physical buttons.
Before an emergency occurs, it’s worth checking your Emergency SOS settings so you understand how your iPhone behaves.
Go to:
Settings → Emergency SOS
You’ll find the available emergency calling options there.
Use the Button Shortcut for Emergency SOS
On supported iPhone models, you can press and hold the side button together with one of the volume buttons to bring up the Emergency SOS controls.
Follow the instructions shown on the screen. Depending on your settings, a countdown may begin before the emergency call is placed.
Knowing the procedure beforehand can make it easier to react quickly during a stressful situation.
Use Five Button Presses
Some iPhones also provide an option to start Emergency SOS by pressing the side button several times.
To check whether this option is enabled:
- Open Settings.
- Tap Emergency SOS.
- Look for the option related to calling with repeated button presses.
- Enable or disable it according to your preference.
The exact options can vary by iPhone model and software version.
Emergency SOS Can Notify Your Emergency Contacts
After an emergency call, iPhone can notify the emergency contacts you have selected when the feature is supported and configured.
The notification can include information such as your location. In supported situations, your contacts may also receive updates when your location changes for a period of time.
This is why it is important to choose your emergency contacts carefully and keep your contact information up to date.
You should also understand what information your iPhone may share before relying on the feature.
Access Medical ID From a Locked iPhone
Medical ID can be useful even when an iPhone is locked.
If the owner has enabled Show When Locked for Medical ID, someone helping them may be able to view important emergency information without knowing the device passcode.
From the Lock Screen, access the emergency options and look for Medical ID. If it is available, the person’s emergency information and listed emergency contacts can be displayed.
This can help someone assisting an injured or unconscious person contact their chosen emergency contacts.
The exact steps can vary slightly depending on the iPhone model and iOS version.
Call Emergency Services From a Locked iPhone
You don’t normally need to unlock an iPhone to make an emergency call.
From the passcode screen, select Emergency and enter the appropriate emergency number for your location.
Emergency numbers vary between countries. For example, 112 is an emergency number used in India and many other countries, while other regions use different numbers.
Always use the emergency number applicable to your current location.
Other Emergency Features on iPhone
Emergency contacts are only one part of Apple’s safety features. Depending on your device, software version, country, and network provider, other options may also be available.
Emergency Text Messages
Some regions support text-based communication with emergency services.
Availability and supported numbers vary by location. If emergency texting is available where you live, you can use the Messages app to contact the appropriate emergency service.
However, you should not assume that emergency texting works everywhere. Check the emergency communication options available in your area before relying on this method.
For an immediate emergency, use the emergency communication method supported by your local authorities.
Emergency SOS via Satellite
Some newer iPhone models support Emergency SOS via satellite in supported countries and regions.
This feature is designed for situations where cellular and Wi-Fi connections are unavailable. It can allow an eligible iPhone to communicate with emergency services using a satellite connection.
Satellite communication has limitations. It depends on your location, surroundings, device compatibility, and regional availability. Trees, buildings, mountains, and other obstacles can affect the connection.
If your iPhone supports the feature, it’s useful to learn how it works before travelling to an area with limited cellular coverage.
Share Video or Other Information With Emergency Services
In some supported locations and emergency situations, emergency services may be able to request additional information such as live video or existing photos and videos.
If this option appears during an emergency call, follow the instructions shown on your iPhone.
You should only share information when requested through the supported emergency service process. Availability of this feature depends on your location, iPhone model, and other requirements.
Use an Apple Watch for Emergency Calls
An Apple Watch can also provide emergency calling features on supported models and configurations.
You can use the watch’s emergency controls to contact emergency services. The available method depends on the model, connection type, and settings.
Before relying on your Apple Watch in an emergency, open its Emergency SOS settings and learn how the controls work.
You can also manage some Apple Watch emergency settings through the Watch app on your iPhone.
Review Your Emergency Settings Regularly
Setting everything up once isn’t enough. Your circumstances and contact information can change.
Every so often, check:
- Your emergency contacts
- Their current phone numbers
- Your Medical ID information
- Emergency SOS settings
- Location-sharing settings
- Emergency communication options available in your region
- Whether your iPhone and Apple Watch are updated
This simple check can help prevent outdated information from causing problems when someone needs to contact you.
Also read: ChatGPT Plus Free Trial in India: How to Check If You’re Eligible
Final Thoughts
Setting up emergency contacts on an iPhone takes only a few minutes, but it can make important information easier to access during an emergency.
Start by completing your Medical ID and adding people you trust as emergency contacts. Then review Emergency SOS, understand how emergency calling works on your iPhone, and check which additional safety features are available in your country.
Most importantly, don’t wait until an emergency happens to learn these controls. Spend a few minutes checking your settings now so you know what to do when you actually need them.

Jatin Rajput (Tech Golu) — Tech blogger & YouTuber with 6+ years of experience in WhatsApp, Instagram, Facebook, and mobile guides. Founder of TechGolu.in.