Keeping a backup of your iPhone is one of the easiest ways to protect your important data. If your phone is lost, damaged, or replaced, a recent backup makes it much easier to restore your photos, videos, contacts, messages, and settings.
This guide explains different ways to back up your iPhone to a MacBook, including Finder, Wi-Fi syncing, and iTunes for older versions of macOS.
Also read: How to Use Low Power Mode on iPhone to Make Your Battery Last Longer
Back Up Your iPhone Using Finder
If your Mac is running macOS Catalina (10.15) or a newer version, Finder is the recommended tool for creating a local iPhone backup.
Before You Start
Make sure the following requirements are met:
- Your Mac is updated to a supported version of macOS.
- Your iPhone is running a compatible version of iOS.
- You have a working USB or USB-C cable to connect your devices.
Step 1: Connect Your iPhone
Use a compatible cable to connect your iPhone to your MacBook.
Depending on your devices, you may need:
- A Lightning to USB cable.
- A USB-C to Lightning cable.
- A USB adapter if your Mac has different ports.
If your Mac asks you to install updates or additional software, complete those first.
Step 2: Trust the Computer
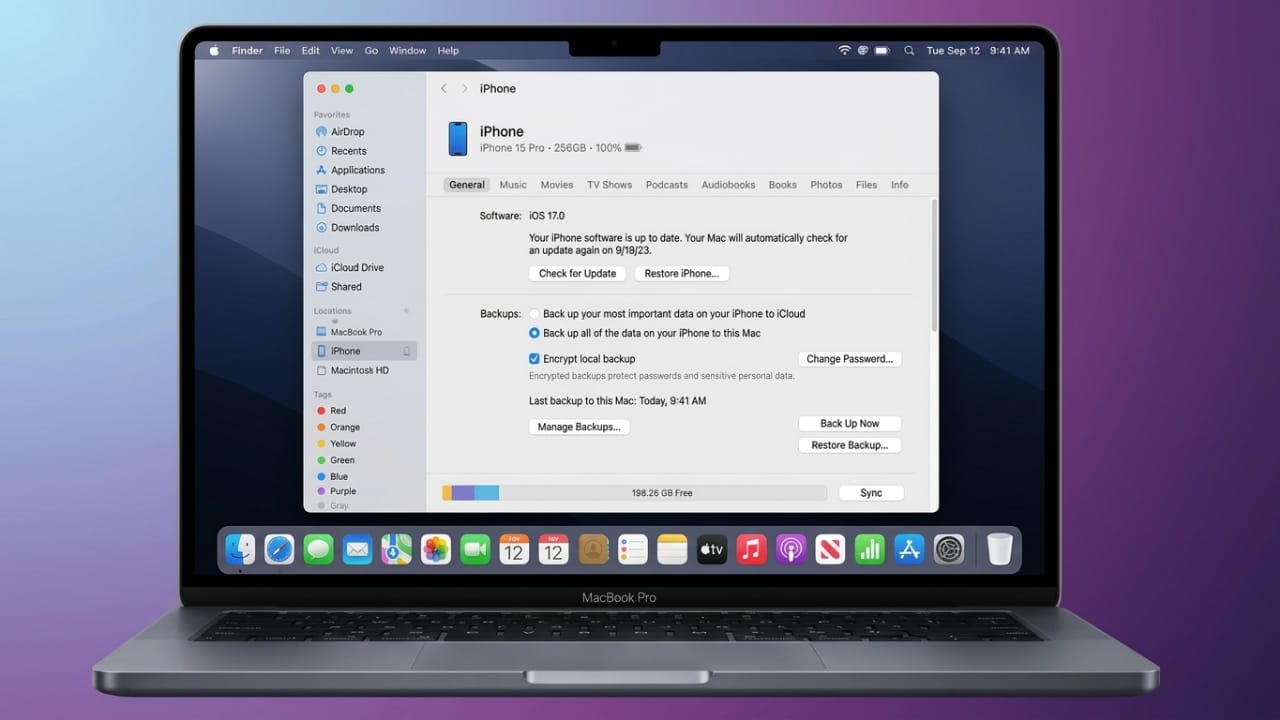
Open Finder on your Mac. Your iPhone should appear in the left sidebar.
Click your device, then select Trust if prompted. You’ll also see a Trust This Computer message on your iPhone. Tap Trust and enter your passcode.
This allows your iPhone and Mac to communicate securely.
Step 3: Create the Backup
Select your iPhone in Finder and open the General tab.
Choose Back up all of the data on your iPhone to this Mac.
If you want extra security, enable Encrypt local backup. You’ll be asked to create a password that you’ll need whenever you restore the backup.
Finally, click Back Up Now and wait until the process finishes. Keep your iPhone connected until the backup is complete.
Back Up Your iPhone Over Wi-Fi
Once you’ve connected your iPhone with a cable at least once, you can enable wireless syncing for future backups.
Requirements
- macOS Catalina (10.15) or later.
- Both your Mac and iPhone connected to the same Wi-Fi network.
Enable Wi-Fi Sync
- Open Finder.
- Select your iPhone.
- Open the General tab.
- Scroll to the Options section.
- Check Show this iPhone when on Wi-Fi.
- Click Apply.
Your iPhone can now connect to your Mac wirelessly whenever both devices are on the same network.
Why Use Wi-Fi Sync?
Wireless syncing offers several benefits:
- No cable is needed after the initial setup.
- Easy access from anywhere on the same Wi-Fi network.
- Convenient for regular backups.
- Faster daily device management.
Back Up an iPhone Using iTunes (Older macOS Versions)
If your Mac runs macOS Mojave or an earlier version, you’ll use iTunes instead of Finder.
Create a Backup
- Connect your iPhone with a USB cable.
- Open iTunes.
- Click the Device icon.
- Select your iPhone.
- Open the Summary section.
- Click Back Up Now.
Your backup will include important information such as app data, settings, messages, and device preferences.
Encrypt Your Backup
For better protection, select Encrypt iPhone Backup before starting.
Choose a strong password and store it safely. Encrypted backups also include additional sensitive information that standard backups may not save.
Keep Older Backups
By default, new backups replace older ones.
If you’d like to keep a specific backup:
- Open Manage Backups in iTunes.
- Right-click the backup.
- Select Archive.
Archived backups won’t be overwritten by future backups.
Restore a Backup
If you ever need your saved data again:
- Open iTunes.
- Go to Preferences > Devices.
- Select the backup you want.
- Click Restore Backup.
Follow the on-screen instructions until the restoration is complete.
Troubleshooting Backup Problems
If your backup doesn’t complete successfully, try these solutions.
Update Your Devices
Install the latest available updates for both macOS and iOS. Software updates often fix compatibility and connection issues.
Unlock Your iPhone
Keep your iPhone unlocked and on the Home Screen before connecting it to your Mac.
Accept Trust Requests
Always approve the Trust This Computer prompt on both devices. Without this permission, Finder or iTunes cannot access your iPhone.
Try Another USB Port
If your Mac doesn’t detect your iPhone, plug the cable into a different USB or USB-C port.
Disconnect Other USB Devices
External accessories can sometimes interfere with connections. Remove unnecessary USB devices and try again.
Use Another Cable
A damaged or unsupported cable can prevent successful backups. If possible, test with another compatible cable.
Check Free Storage
Your Mac needs enough available storage to save the backup. Remove unused files if storage is running low.
Restart Both Devices
Restart your MacBook and iPhone, then try the backup process again.
Confirm That Your Mac Detects the iPhone
If Finder still doesn’t recognize your device:
- Connect and unlock your iPhone.
- Open the Apple menu.
- Hold the Option key.
- Select System Information.
- Click USB.
- Look for your iPhone under the USB device list.
If it doesn’t appear, there may be a hardware or connection issue.
Other Ways to Back Up Your iPhone
Use iCloud Backup
You can also save your iPhone data to iCloud.
To enable it:
- Open Settings.
- Tap your Apple ID.
- Select iCloud.
- Tap iCloud Backup.
- Turn on iCloud Backup.
You can also tap Back Up Now whenever you want to create a manual backup.
Back Up to a Windows Computer
Windows users can back up an iPhone with iTunes.
Simply connect the iPhone, open iTunes, select your device, and choose Back Up Now.
Save Backups to an External Drive
For additional protection, you can copy your existing backup folder from your Mac to an external hard drive. Keeping an extra copy is useful in case your computer’s storage becomes unavailable.
Also read: How to Cut Down Screen Time on Android and Sleep Better
Final Thoughts
Regular iPhone backups help protect your important data from unexpected loss. Finder offers a simple and reliable solution for modern Macs, while iTunes remains useful for older macOS versions. You can also choose Wi-Fi syncing for added convenience or use iCloud if you prefer cloud storage.
Whichever method you choose, creating backups regularly ensures your photos, messages, contacts, and settings remain safe and easy to restore whenever needed.

Jatin Rajput (Tech Golu) — Tech blogger & YouTuber with 6+ years of experience in WhatsApp, Instagram, Facebook, and mobile guides. Founder of TechGolu.in.