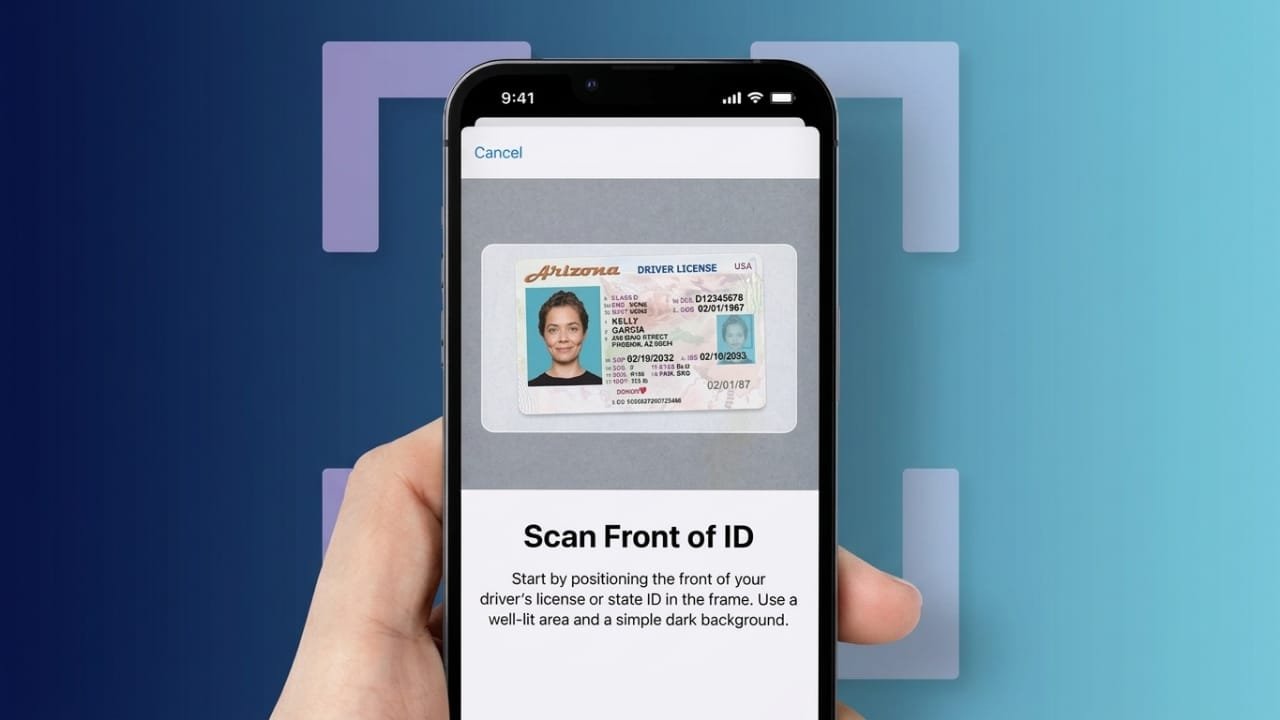
If you’ve ever left your wallet at home and panicked about getting through airport security, you’ll like this feature. Apple Wallet can now hold a digital version of your driver’s license or state ID. Once it’s set up, your iPhone (or Apple Watch) becomes a valid way to prove who you are at supported checkpoints, apps, and stores.
Here’s a simple breakdown of why it’s worth doing, what you need, and exactly how to set it up.
Also read: How to Add Photo Filters to iPhone Photos in 2026
Why Bother Adding a Digital ID?
A few solid reasons people are switching over:
- Less to carry. Your phone is already in your hand most of the time, so there’s one less card to worry about.
- Quicker at the airport. At TSA lanes that accept digital ID, you just tap your phone or watch near the reader instead of digging through a bag.
- Better protection than plastic. A physical card can be lost or duplicated. The digital version is encrypted and follows the ISO 18013-5 standard for mobile IDs.
- You control what’s shared. Face ID or your passcode unlocks it, and neither Apple nor your state’s DMV can see when or where you use it.
- Selective sharing. Instead of handing over a card that shows everything, you can share just what’s asked for, like your birth date or photo, and nothing else.
- Works on more than one device. Once it’s added, it can sit on both your iPhone and your Apple Watch without needing separate apps.
What You’ll Need Before Starting
- An iPhone 8 or newer (including the second-generation iPhone SE), running at least iOS 15.4.
- Face ID or Touch ID already turned on.
- An Apple Watch Series 4 or later with watchOS 8.4+, if you want it there too.
- An Apple ID with two-factor authentication switched on.
- Your iPhone’s region set to the United States.
- A steady internet connection while you go through setup.
- Your actual, unexpired driver’s license or state ID.
Not every state offers this yet, since Apple has to work directly with each state government to enable it. Check the list below before you get your hopes up.
States That Currently Support Apple Wallet IDs
As of 2026, you can add a digital license or ID if you live in one of these:
- Arizona
- Maryland
- Colorado
- Georgia
- Ohio
- California
- Hawaii
- Iowa
- New Mexico
- Montana
- North Dakota
- West Virginia
- Illinois
- Arkansas
- Virginia
- Puerto Rico (as a U.S. territory)
Apple has also said North Carolina, Connecticut, Kentucky, Mississippi, Oklahoma, and Utah are expected to join at some point. Separately, the UK government has been exploring its own GOV.UK Wallet app, which would let residents store a digital version of their license too.
Keep in mind: your digital ID is officially recognized in the state that issued it, though it’s accepted at many TSA checkpoints across the country regardless of where you got it.
Setting Up Your Digital ID, Step by Step
You can only attach one license or ID per Apple Account, so make sure you’re ready before starting.
- Open the Wallet app and tap the + icon in the corner.
- Choose Driver’s License and ID Cards from the menu.
- Pick your state from the supported list.
- Choose whether to add it just to your iPhone, or to your iPhone and Apple Watch together. You can always add it to the Watch afterward.
- Use your camera to scan the front and back of your card. Lay it flat on something dark, in good light, so the scan comes out clean.
- Follow the prompts to confirm your identity (details on that below).
- Once submitted, your state’s issuing office reviews the request. This can take anywhere from a few minutes to a few hours.
- You’ll get a notification once it’s approved, and the card will show up in Wallet ready to use.
Worth noting: this digital copy doesn’t replace your physical card legally. Most states still require you to carry the real one. Think of the digital version as a convenient backup, not a full swap.
The Identity Verification Step
After scanning your card, Apple wants to confirm the photo on it is actually you. Here’s what that looks like:
- Tap Get Started, and you’ll be asked to record a short selfie video or scan using Face ID.
- Stand somewhere with plain background and decent lighting.
- Take off glasses, hats, or anything covering your face.
- Hold the phone steady and follow simple prompts, like turning your head or smiling, so it can build a 3D reference of your face.
- Each movement is confirmed with a small vibration.
- Finish by authenticating with Face ID or Touch ID.
This data gets encrypted and sent off for comparison against your ID photo. If it matches, you’re done. If something looks off, you might get a follow-up request for extra verification, which you’ll handle through a link from your state.
Adding the ID to Your Apple Watch
If it’s already on your iPhone, moving it to your Watch is quick:
- Open the Watch app on your iPhone and go to My Watch.
- Scroll to Wallet & Apple Pay.
- Under “Other Cards on Your Phone,” you’ll see your license or ID listed.
- Tap Add, then follow the on-screen steps.
Moving Your ID to a New iPhone
Getting a new phone doesn’t mean starting from scratch:
- During setup, when you reach the data transfer screen, choose Transfer from your old iPhone.
- Once the basic transfer finishes, select Wallet from the list of items to bring over.
- Choose your license or ID.
- You may need to verify your face again with Face ID.
- Confirm, and it’ll reappear in Wallet on the new device.
If you skip this during setup, you can always add it manually later, though you’ll need to redo the full verification process. If you’re not using Quick Start, just sign into the same Apple ID on the new phone and add the ID from scratch in Wallet.
How to Actually Use It
Checking your ID details
Open Wallet, tap your card, then tap the info button and authenticate. You’ll see your address, birth date, height, eye color, and other listed info, plus contact details for your issuing authority in case something’s wrong.
Showing it at TSA or in person
- Double-click the side button and authenticate.
- Tap the card stack and pick your ID.
- Hold your phone near the reader.
- Confirm the request by double-clicking the side button again.
- The reader picks it up over NFC without you handing your phone to anyone. A checkmark confirms it worked.
For Apple Watch, unlock your paired iPhone first, then double-click the Watch’s side button and hold it near the reader.
As of 2026, digital ID is accepted at over 250 airports, but not every checkpoint supports it, so check signage before relying on it.
Sharing it with an app
When an app asks for ID verification, tap Continue with Apple Wallet, review exactly what info it’s requesting and why, then confirm with your side button and Face ID or Touch ID. The app only receives the specific details you approved, not your whole ID.
Removing an ID From Wallet
Since only one ID can be linked at a time, you’ll need to remove the old one before adding a new one (say, after moving states):
- Open Wallet and tap your ID.
- Tap the info button.
- Scroll down and tap Remove Driver’s License (or Remove This ID).
- Confirm. Your state gets notified, and it’s wiped from your device and iCloud.
It’s also smart to remove it before selling or giving away your phone.
Common Problems and Fixes
| Problem | What to try |
|---|---|
| ID won’t add | Check if it’s already linked to a different Apple Account and remove it there first |
| Your state isn’t listed | It may not support this yet; check back periodically |
| Scan won’t work | Improve lighting, use a plain dark background, clean your camera lens |
| Face verification fails | Make sure your face is well-lit and repeat the gestures carefully |
| Approval taking forever | States process at different speeds; check your DMV’s site or app, and use stable Wi-Fi |
| Missing from Apple Watch | Add it manually through the Watch app under Wallet & Apple Pay |
| Other glitches | Update iOS, reset network settings, or sign out and back into your Apple ID |
Passport-Based Digital ID
Starting with iOS 26.1, Apple added support for a passport-based digital ID. U.S. passport holders can now add this to Wallet even if their state doesn’t support driver’s license digitization yet. It works the same way as a state ID, with facial verification and selective info sharing, and it’s mainly useful for domestic travel and general identity checks.
iOS 26 also brought a few other travel-related upgrades to Wallet, including live boarding pass updates, airport maps, AirTag-based luggage tracking, and the ability to verify your identity on certain websites, not just apps.
Also read: How to Create and Share a Wi-Fi QR Code on Android and iPhone
Final Thoughts
Apple’s digital ID setup is a practical way to cut down on what you carry while adding an extra layer of security to how you prove your identity. It only takes a few minutes to set up, and as more states get on board, it’s likely to become just as normal as tapping your phone to pay for coffee. If your state already supports it, there’s little reason not to give it a try.

Jatin Rajput (Tech Golu) — Tech blogger & YouTuber with 6+ years of experience in WhatsApp, Instagram, Facebook, and mobile guides. Founder of TechGolu.in.