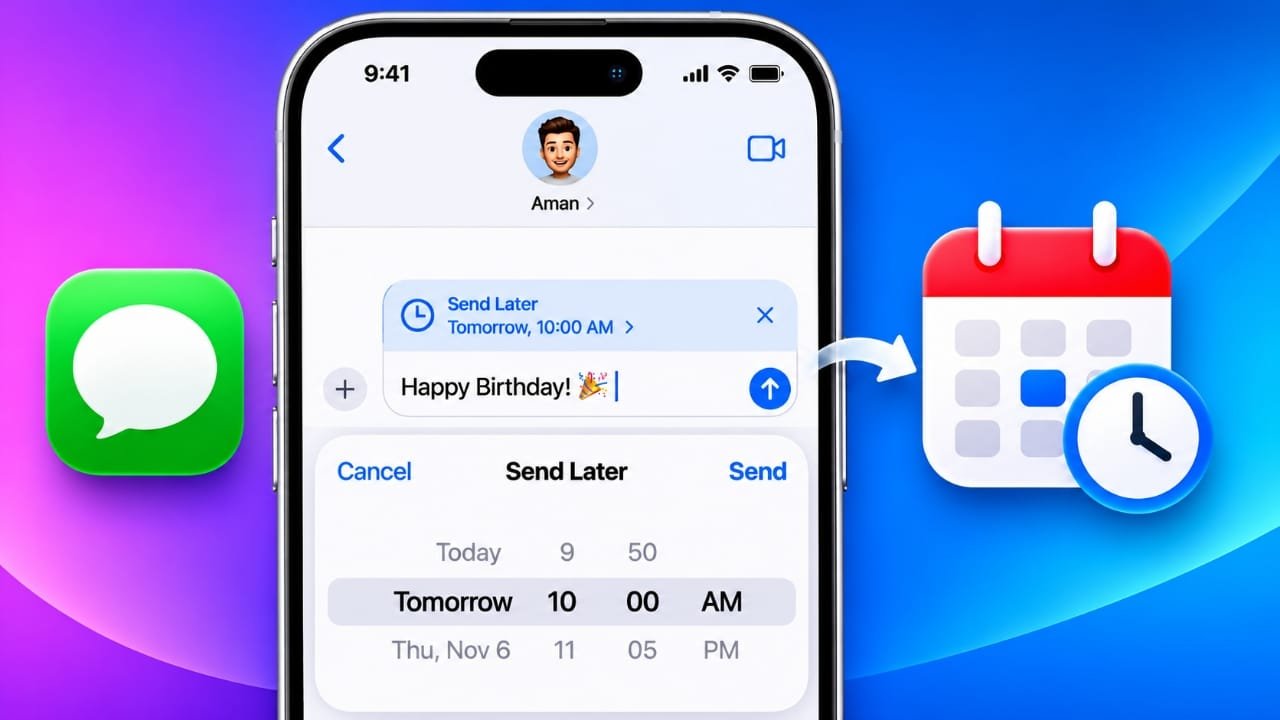
Sometimes you want to send a message, but the timing is not right. Maybe it is a birthday wish that should arrive at midnight, a reminder you want to send during working hours, or a message for someone living in another time zone.
If you use an iPhone with iOS 18 or newer, you can schedule certain messages directly from the Apple Messages app. The built-in Send Later option lets you write a message now and choose when it should be delivered.
There is also another option using the Shortcuts app. It can be useful when you want recurring messages or need to schedule something further into the future.
Here is how both methods work and what you should know before using them.
Also read: How to Set Up Medical ID on iPhone and Why You Should Use It
Advertisements
What Does Message Scheduling Do on iPhone?
Message scheduling lets you prepare a text in advance and set a specific date and time for it to be sent.
For example, you could schedule:
- A birthday message for a friend.
- A reminder for a family member.
- A work-related message for the next morning.
- A message to someone in a different time zone.
- A simple reminder that you might otherwise forget.
The main advantage is convenience. You can write the message when you remember it without having to send it immediately.
On compatible iPhones, Apple provides this feature directly inside the Messages app, so you do not need a separate scheduling application for normal one-time messages.
How to Schedule a Message Using “Send Later”
Apple’s built-in scheduling option is available for iMessage conversations on supported iOS versions.
Before You Start
Keep these points in mind:
- You need iOS 18 or later for the built-in Send Later option.
- The conversation needs to use iMessage.
- iMessage conversations normally appear as blue bubbles.
- Standard SMS and MMS conversations use green bubbles and do not support the same Send Later feature.
- Apple limits how far ahead a message can be scheduled through the built-in option.
If the conversation is using SMS instead of iMessage, the Send Later option may not appear.
Steps to Schedule a Message
- Open the Messages app on your iPhone.
- Open the iMessage conversation where you want to send the message.
- Type your message as usual.
- Tap the + button next to the text field.
- Select More if necessary.
- Tap Send Later.
- Choose the date and time when you want the message to arrive.
- Check the message and scheduled time.
- Tap the Send arrow to confirm.
The message will remain inside the conversation as a scheduled item rather than appearing like a normal sent message.
You can identify it by its scheduled status and the time shown with it.
How to Change or Cancel a Scheduled Message
Plans can change, so Apple also gives you options for managing messages that have not been sent yet.
Change the Delivery Time
Open the conversation and find the scheduled message.
Tap Edit beside the scheduled time and choose a new date or time. Confirm the change when finished.
This can be particularly useful if your plans change or you are traveling between different time zones.
Send It Immediately
If you decide that the message should go out now, you can choose the option to send the scheduled message immediately.
This saves you from having to delete the scheduled message and create another one.
Edit the Message
You can also change the wording before it is delivered.
Touch and hold the scheduled message and look for the editing option. Make your changes and confirm them before the scheduled delivery.
Delete the Scheduled Message
If you no longer want the message to be sent, touch and hold the scheduled message and use the available delete option.
Once removed, the scheduled message will not be delivered.
Can You Schedule Messages More Than 14 Days Ahead?
The built-in Send Later feature is designed for relatively short-term scheduling and has a limited scheduling window.
If you need something that repeats regularly or you want to automate a message farther into the future, the Shortcuts app can be a better option.
For example, you could create an automation that sends a particular message at a chosen time on a recurring schedule.
How to Schedule Messages With the Shortcuts App
The Shortcuts method works differently from the built-in Messages scheduler.
Instead of scheduling one individual message, you create an automation that performs the messaging action at a particular time.
Set Up a Message Automation
- Open the Shortcuts app.
- Tap the Automation tab.
- Choose the option to create a new automation.
- Select Time of Day.
- Choose the time when you want the automation to run.
- Select whether it should repeat and choose the required schedule.
- Tap Next.
- Add the Send Message action.
- Enter the message you want to send.
- Select the recipient or recipients.
- Review the automation settings.
- Save the automation.
Depending on your iPhone and current iOS version, the names or placement of some options may look slightly different.
Should You Turn Off “Ask Before Running”?
Shortcuts can ask for confirmation before running an automation.
If you want the automation to run without requiring you to approve it each time, check whether Ask Before Running is enabled and turn it off where the option is available.
However, it is a good idea to review the automation carefully before allowing it to run automatically. An incorrectly configured automation could send the wrong message or send it at an unexpected time.
How to Delete a Message Automation
Once you no longer need an automation, you can remove it from Shortcuts.
- Open the Shortcuts app.
- Go to Automation.
- Find the message automation you created.
- Swipe left on it.
- Tap Delete.
The automation will then stop running.
Why Is “Send Later” Missing on My iPhone?
If you cannot find the Send Later option, there are several things worth checking.
Check Your iOS Version
The built-in feature requires a compatible version of iOS.
Go to:
Settings → General → Software Update
Check whether your iPhone is running a supported version.
Check Whether the Conversation Uses iMessage
Look at the message bubbles in the conversation.
Blue bubbles indicate iMessage, while green bubbles generally indicate SMS or MMS.
If the conversation is using SMS/MMS, the built-in Send Later feature may not be available.
Check iMessage Settings
You can check whether iMessage is enabled by going to:
Settings → Apps → Messages
Depending on your iOS version, the location or wording of the Messages settings may differ slightly.
Make sure iMessage is enabled if you want to use Apple’s iMessage-based scheduling feature.
What If a Scheduled Message Does Not Send?
If a scheduled message does not appear to have been delivered, first check your internet connection and iMessage status.
Also make sure the recipient can still receive iMessages.
A conversation can sometimes change from iMessage to SMS, for example if iMessage becomes unavailable. That can affect features that depend on iMessage.
If the scheduled message is still visible in the conversation, open it and check its status. You may also be able to edit, reschedule, or send it manually.
Tips for Scheduling Messages
Check the Time Zone
Time zones can easily cause mistakes when you are traveling or messaging someone who lives somewhere else.
Before scheduling a message, make sure the selected time is appropriate for the recipient.
If you are traveling, keeping your iPhone’s date and time settings configured automatically can help prevent unnecessary time-zone confusion.
Review the Message Before Scheduling
Take a moment to read the message before confirming it.
This is especially important for work messages, reminders, addresses, dates, and other information that could become outdated.
Avoid Scheduling Time-Sensitive Information
Some information is only useful for a short period.
For example, avoid relying on a scheduled message for:
- One-time verification codes.
- Temporary links.
- Changing appointment details.
- Information that may become outdated before the scheduled time.
If the information could change, it may be better to send it manually when needed.
Use Scheduling for Professional Messages
Scheduling can be useful when you want to write a work-related message outside normal working hours but do not want to disturb someone immediately.
You can prepare the message when it is convenient for you and schedule it for a more appropriate time.
Double-Check Before the Final Confirmation
Before scheduling, check both the recipient and the delivery time.
A few seconds of review can prevent an embarrassing message from being sent to the wrong person or at the wrong time.
Built-In Scheduling vs. Shortcuts
Both options have their own advantages.
The Messages Send Later feature is better when you want to schedule an individual iMessage quickly.
The Shortcuts app is more useful when you want to create an automation that follows a repeating schedule or performs an action automatically.
For a simple birthday wish or reminder, the built-in Messages option is usually the easier choice. For recurring tasks, Shortcuts gives you more flexibility.
Also read: How to Fix Wi-Fi Problems on a Mac: 10 Simple Solutions
Final Thoughts
Scheduling messages on an iPhone can make everyday communication much easier. Instead of waiting for the right moment to send something, you can prepare it in advance and let your iPhone handle the timing.
If you are using a compatible iOS version and the conversation supports iMessage, the built-in Send Later option is the simplest way to schedule a message.
For recurring tasks or more customized automation, the Shortcuts app provides another useful option.
Just remember to check the recipient, message content, date, and time before confirming the schedule. That small step can help ensure your message reaches the right person at the right moment.

Jatin Rajput (Tech Golu) — Tech blogger & YouTuber with 6+ years of experience in WhatsApp, Instagram, Facebook, and mobile guides. Founder of TechGolu.in.