Apple includes many accessibility features in the iPhone and iPad to help people use their devices more comfortably. One of the most powerful tools is Switch Control. This feature allows users to control their device without relying on regular touch gestures.
Instead of tapping the screen, Switch Control lets you interact with the device using external switches, adaptive accessories, or alternative input methods. It is especially useful for people who have limited mobility or difficulty using a touchscreen.
In this guide, you will learn what Switch Control is, how it works, how to enable it, and how to customize it for easier use.
Also read: Make Your Old iPhone Feel Faster: 15 Practical Tips to Improve Performance
What Is Switch Control?
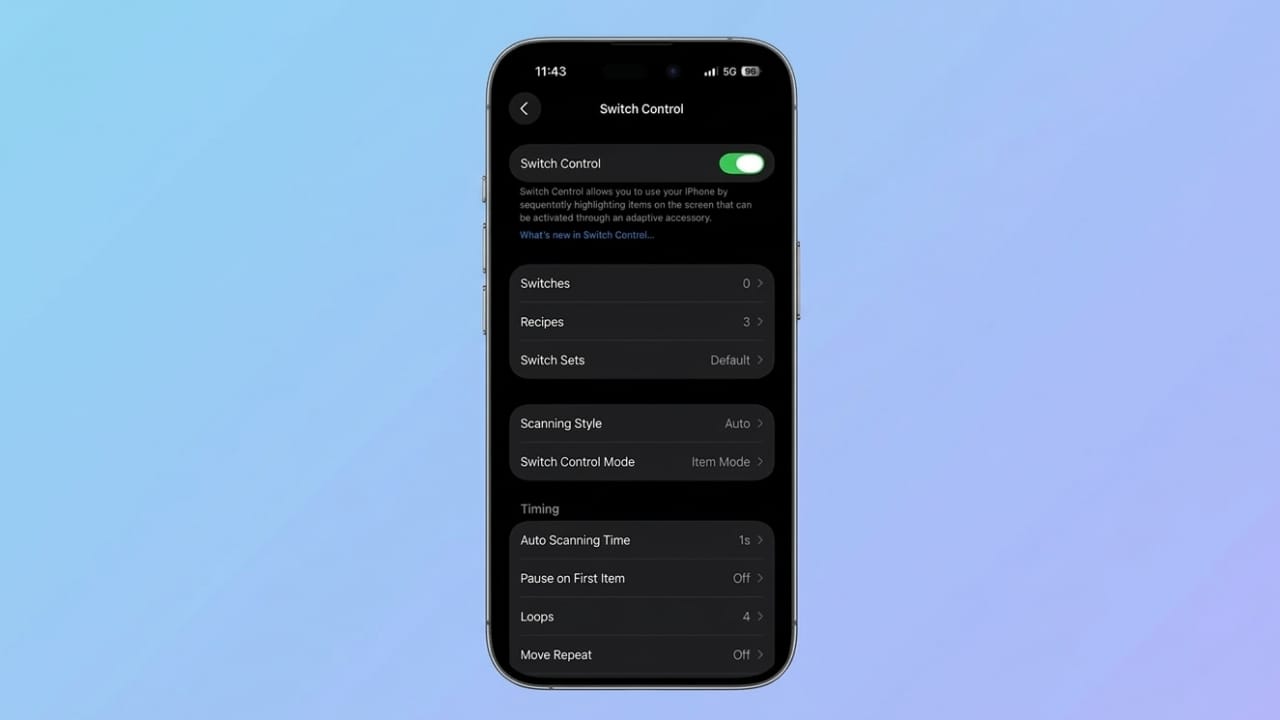
Switch Control is an accessibility feature available on iPhone and iPad that allows users to operate their device using switches or alternative inputs instead of touch gestures.
It is mainly designed for people who may find it difficult to use the touchscreen due to physical limitations. With this feature, users can move through items on the screen, select apps, type text, and perform actions using one or more switches.
The system works by highlighting items on the screen one by one. When the desired item is highlighted, the user activates a switch to select it.
Simply put, Switch Control helps people use their device with minimal physical interaction.
How Switch Control Works
Switch Control uses a system called scanning. The device automatically moves a highlight across items such as buttons, icons, or menus.
When the highlight reaches the item you want, you activate your switch to select it.
There are three main scanning styles available:
1. Auto Scanning
The highlight automatically moves across items on the screen at a chosen speed. When the correct item appears, you press the switch to select it.
2. Manual Scanning
One switch moves the highlight between items, while another switch confirms the selection.
3. Single-Switch Step Scanning
Only one switch is used. It moves through items step by step, and timed actions help select them.
A floating menu also appears during navigation. This menu allows you to perform actions such as:
- Scrolling pages
- Performing gestures like swiping
- Adjusting device controls
- Opening system features
New Improvements in Switch Control (iOS 26)
Recent updates have made Switch Control easier to use and more flexible. Here are some of the newer improvements.
1. Switch Sets
Users can now create multiple switch configurations and change between them quickly.
For example, you might have:
- One setup for typing
- Another setup for browsing or controlling media
This saves time because you no longer need to reconfigure switches each time.
2. Slide to Type Support
Typing with Switch Control has become faster. Instead of selecting each key separately, you can move the cursor across the keyboard.
The system predicts words based on the cursor’s path, similar to swipe typing on a touchscreen keyboard.
3. Quick Access to AssistiveTouch
Switch Control can now jump directly to AssistiveTouch from its menu. This makes it easier to switch between accessibility tools depending on your needs.
4. Eye Tracking
Eye Tracking allows the front camera to detect where you are looking. Your gaze moves the cursor, and a switch confirms the selection.
This feature enables near hands-free navigation.
How to Turn On Switch Control
Setting up Switch Control on an iPhone or iPad takes only a few steps.
- Open Settings
- Tap Accessibility
- Select Switch Control under the Physical and Motor section
- Turn Switch Control on
- Tap OK to confirm
Once enabled, the scanning highlight will begin moving across the screen.
How to Add a Switch
Before using Switch Control, you must assign at least one switch.
Follow these steps:
- Go to Settings → Accessibility → Switch Control
- Tap Switches
- Select Add New Switch
- Choose the switch source you want to use
- Assign an action such as navigation or selection
You can add multiple switches for more advanced control.
How to Navigate Using Switch Control
After enabling Switch Control and setting up switches, you can start using it to move around your device.
Step 1: Watch the Highlight
A box will move across items on the screen. This box shows what can be selected.
Step 2: Activate Your Switch
When the highlight reaches the item you want, press your assigned switch.
Step 3: Use the Action Menu
Instead of immediately performing an action, a menu appears with options like:
- Tap or open an app
- Scroll through lists or pages
- Perform gestures such as swiping
- Access notifications or Control Center
- Adjust volume or system settings
Choose the action you want using your switch.
To turn off Switch Control later, go back to Settings → Accessibility → Switch Control, or use the Accessibility Shortcut if you enabled it.
Customizing Switch Control Settings
Adjusting the settings helps make Switch Control more comfortable and accurate.
Change the Scanning Style
- Go to Settings → Accessibility → Switch Control
- Tap Scanning Style
- Choose from:
- Auto Scanning
- Manual Scanning
- Single-Switch Step Scanning
Adjust Scanning Speed
Scanning speed controls how fast the highlight moves.
- Open Auto Scanning Time
- Use the + or – buttons to increase or decrease speed
Other timing settings include:
- Pause on First Item – Adds a delay before scanning begins
- Loops – Sets how many times scanning repeats
- Move Repeat – Allows repeated actions when holding a switch
- Long Press – Adds extra actions when holding a switch longer
It’s best to start with a slower speed and adjust it later.
Change Cursor Appearance
Visual adjustments make the highlight easier to see.
- Go to Settings → Accessibility → Switch Control
- Find the Visual section
Here you can:
- Enable Large Cursor
- Change the Cursor Color
Create Custom Gestures
Switch Control can perform complex gestures such as swipes or pinches.
Steps:
- Open Settings → Accessibility → Switch Control
- Tap Saved Gestures
- Select Create New Gesture
- Perform the gesture on the screen
- Save and name it
You can trigger these gestures later using your switch.
Use Recipes for Different Tasks
Recipes allow switches to perform different actions depending on the activity.
To create a recipe:
- Go to Settings → Accessibility → Switch Control
- Tap Recipes
- Select Create New Recipe
- Name the recipe
- Assign actions to switches
You can also set a timeout so the recipe automatically switches back to the default settings after a certain time.
Enable Audio Feedback
Switch Control can provide sound or spoken feedback during scanning.
- Open Settings → Accessibility → Switch Control
- Scroll to the Audio section
- Enable Sound Effects
- Turn on Speech for spoken feedback
This helps users know what item is currently highlighted.
Switch Control vs AssistiveTouch vs Voice Control
iPhone and iPad offer several accessibility tools that reduce the need for traditional touch input. Each feature serves a different purpose.
Switch Control
- Uses switches or scanning to control the device
- Ideal for users with limited mobility
- Highly customizable but requires some setup
AssistiveTouch
- Displays a floating on-screen menu
- Provides shortcuts for common gestures
- Easier to learn and use
Voice Control
- Allows users to control the device using spoken commands
- Supports hands-free navigation and dictation
Each feature is useful depending on the user’s needs and preferred way of interacting with the device.
Also read: How to Understand the Meaning of Emojis on iPhone
Final Thoughts
Switch Control is one of the most flexible accessibility features available on iPhone and iPad. Once properly configured, it allows users to navigate apps, type, and control system functions without relying on traditional touch gestures.
Because it supports various input methods and customizable settings, it can be adapted to match different accessibility needs and preferences.
If you haven’t explored Switch Control yet, it may be worth trying to see how it can improve the way you interact with your device.

Jatin Rajput (Tech Golu) — Tech blogger & YouTuber with 6+ years of experience in WhatsApp, Instagram, Facebook, and mobile guides. Founder of TechGolu.in.